Backpacking Cambodia: 3 Suggested Itineraries for Your Trip

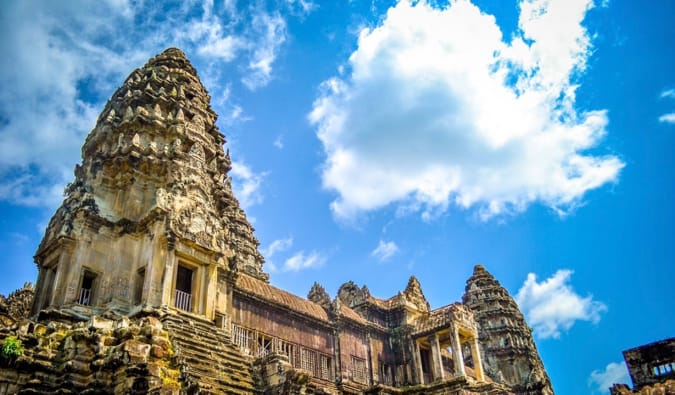
A blue sky over the ancient buildings of Angkor Wat in Cambodia
Posted: 5/1/2019 | May 1st, 2019

Cambodia: it’s full of warm and friendly people, beautiful coastlines, and lively nightlife, and it has a growing foodie scene. It’s also one of the cheapest countries in the world.

I didn’t have high expectations when I first visited in 2006. Back then, all I knew about Cambodia was its awful history involving the Khmer Rouge and that it was home to Angkor Wat.

But I was blown away by the people and their warmth, spirit, and hospitality; the beautiful natural scenery; and the country’s long history. It was wonderful, and I ended up staying weeks longer than I thought I would (I especially loved Phnom Penh). I returned often, including spending over a month there when I was writing my first book. (It made for a great base of operations.)

In the last decade or so, Cambodia has grown by leaps and bounds. Sleepy little towns I visited before are now megacities, tourists (especially Russians and Chinese) visit en masse, there are more ATMs (there was exactly one in the country when I first went), and there’s a growing expat and foodie scene.

Cambodia still has problems, but it’s a lot more cosmopolitan today than when I first went.

What should you do when you visit Cambodia?

How should you plan your trip?

Below are some itineraries that include the best destinations in Cambodia. You can use them as a guideline to help you make the most of your trip!

What to See and Do in Cambodia: A One-Week Itinerary

Day 1 – Phnom Penh
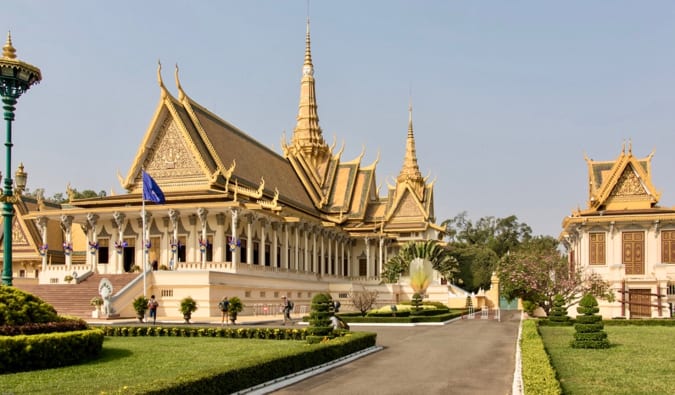
The Royal Palace in Phnom Penh, Cambodia
The capital of Cambodia, Phnom Penh has a Wild West ambiance, with dusty streets and a “devil may care” atmosphere. It has a few good attractions and an up-and-coming foodie scene.

The main attraction is the Royal Palace. Start there, and don’t miss the beautiful flower gardens and the Silver Pagoda, whose floor is made up of more than 5,000 silver tiles; inside is an emerald-covered Buddha and a diamond-covered Maitreya Buddha. It also has murals around its outer wall that tell the story of the Ramayana.

On the palace grounds are five stupas, with the two largest to the east containing the ashes of King Norodom and King Udung (the two most famous kings of modern Cambodia) and a statue of King Norodom on horseback. Admission is $10 USD for foreigners.

After seeing the palace, learn about the country’s tragic, not-too-distant history. The Tuol Sleng Genocide Museum is a former school where the Khmer Rouge interrogated and tortured people in the 1970s. You’ll see rusty beds and torture devices, in sharp contrast to the beautiful trees and lovely jasmine smell in the gardens. Admission is $5 USD for adults and $3 USD for anyone under 18.

Afterward, head to the Killing Fields, about 14km from Tuol Sleng. Although a visit to Choeung Ek (the best-known site) may not be the most cheerful way to spend an afternoon, it makes for a hallowed and memorable experience, a testament to the dangers of uncontested power. You won’t believe the memorial building in the center that is filled with skulls. Admission is only $3 USD; expect to pay at least $15 USD for a return-trip tuk-tuk ride.

(Tip: Visit the museum before heading to the Killing Fields, as it will open your eyes to the atrocities that happened here.)

Where to Stay in Phnom Penh: Sla Boutique Hostel – This is a pretty nice hostel not far from restaurants, bars, and attractions. It’s clean, and the beds are comfy and have privacy curtains. The staff (especially Mr. Star) are super friendly, and they can really help you plan your trip.

Day 2 – Phnom Penh
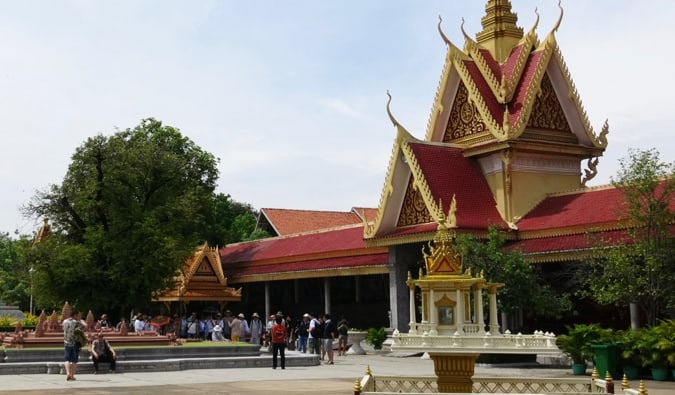
People visiting one of the many temples in Phnom Penh, Cambodia
Spend your second day wandering around the city, and start by seeing the Independence Monument, designed by architect Vann Molyvann and inaugurated in 1958. It was created to mark Cambodia’s independence from French rule, though it also serves as a de facto war memorial. It’s one of the biggest landmarks in the city and a good place to start your day.

If you’re in the city on a weekend, try to catch an architectural walking tour with KA Tours, which has excellent guides who are students or experts in architecture, plus they’re not very expensive, around $15.

Check out the Cambodian Living Arts Center, a traditional dance school and performance center where you can watch students in training and see traditional live theatre. This is a fun way to spend a couple of hours while learning about the artistic traditions of the country. You can also take part in a workshop, which last around 90 minutes and cost $15 USD per person.

Make sure you stroll along Sisowath Quay on the Mekong River. The 3km walkway is busy and full of restaurants, bars, cafés, and shops.

Day 3 – Sihanoukville
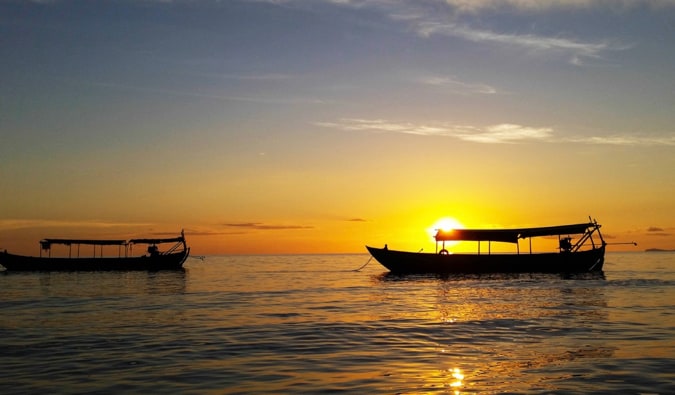
Boats floating in the water near Sihanoukville, Cambodia
Get an early start and take a five-hour bus ride to Sihanoukville, named after the ruling prince of Cambodia in 1964. It was a lazy beach town until about 2010, when it took off with travelers (and tons of Chinese and Russian tourists on package tours) because of its white-sand beaches, nearby deserted islands, excellent diving, and delicious seafood. Its varied nightlife filled with cheap booze makes it the premier backpacker party city in Cambodia.

If you’re looking to soak up some sun, Independence Beach and Otres Beach are probably your best bets. Serendipity Beach used to be a great party spot, but there’s a lot of Chinese development going on now, so I wouldn’t stay there.

Where to Stay in Sihanoukville: Monkey Republic – This hostel is awesome. It’s a happening place, with a bar, restaurant, and pool. The staff is really friendly, and they host a lot of events. (Say hi to Aaron for me!) They can also organize a lot of day trips for you too.

Day 4 – Sihanoukville
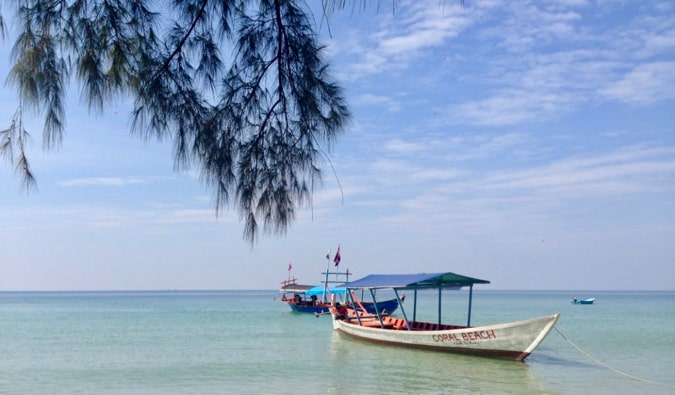
A small boat on the beach in Sihanoukville, Cambodia
Today is a day for day trips.

From Sihanoukville, hop on a boat and take a 45-minute ride to Koh Rong. While you can stay overnight, if you’re pressed for time, you can do it in a day trip. The beaches here are way better than on the mainland (and a lot less polluted). Snorkeling day trips cost approximately $21 USD and include lunch and equipment; there are PADI-certified schools in the area that offer a variety of different dive trips for one or more days.

If you don’t feel like heading to Koh Rong, you could book motorbike trip into Bokor National Park (as well as longer, multiday trips if you’re interested). There, you can hike through a great rainforest or see the atmospheric ruins of the French aristocracy for whom Bokor was a big draw back in the day. You’ll have some amazing views and find ruins, waterfalls, and temples all around.

You could also do a day trip to Kampot and the pepper fields in that area too.

Day 5 – Siem Reap
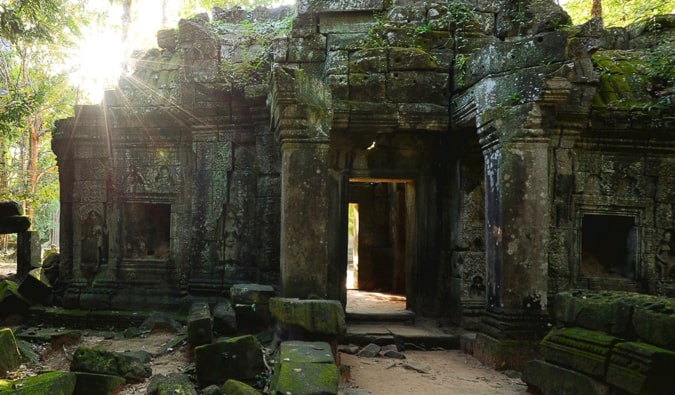
The old temples of Angkor Wat in Cambodia
It’s gonna be a busy travel day. From Sihanoukville, you’ll need to return to Phnom Penh and then get on another bus to Siem Reap. I recommend Capitol Tours. It’s a 12-hour ride, so it’ll be evening by the time you get to Siem Reap.

(Note: It’s better to take the night bus so as not to waste a day. You won’t sleep well, but you also won’t lose a day!)

Siem Reap is located on the northeastern side of Tonle Sap Lake and is the main access to Angkor Wat. The center remains a rural old town, with French-style houses and shops. The area around the Old Market is crowded with locals and foreigners all day long.

Where to Stay in Siem Reap: Topsky Hostel – This hostel offers basic accommodations in a pretty quiet area that’s not far from the action. Try to get a lower bunk with a privacy curtain. The friendly staff will help you arrange a tuk-tuk and activities too.

Day 6 – Siem Reap
A tree growing around a temple at Angkor Wat in Cambodia
Spend your day at Angkor Wat, the ancient city that was the center of the Khmer Empire that once ruled most of Southeast Asia. The temple was built in the 12th century and covers over 500 acres.

The most popular temples are Angkor Wat, Bayon, Ta Phrom, and Angkor Thom. I would recommend getting a multiday pass so you can visit some of the outer temples where there are fewer visitors. You can hire a tuk-tuk for the day for around $20-25 USD or rent bicycles and explore on your own.

Angkor Wat is open daily from 5am to 6pm. Admission is $37 USD per person for a day pass, $62 USD for a three-day pass, and $72 USD for a seven-day pass.

Day 7 – Siem Reap
One of the many ancient temples surrounded by trees at Angkor Wat in Cambodia
Enjoy your last day in Cambodia by exploring more of the Siem Reap area. Head over to the Angkor Wat complex for several more hours in the morning and then head over to astonishing Banteay Srei.

Known as “the city of women,” this temple was dedicated to the Hindu god Shiva and features a number of outstanding red sandstone statues. (You need an Angkor Wat Pass to visit.)

If you have time, visit Tonle Sap, Southeast Asia’s largest freshwater lake. It is 52km (32 miles) from Siem Reap. Sailing down the river and around the lake gives you a look at how closely Cambodian life is tied to this major waterway. Tours start around $2.50 USD per person.

What to See and Do in Cambodia: A Two-Week itinerary

Want to spend more time in Cambodia? Great! You should! There are tons of other places to visit. Here are my suggestions:

Days 1 & 2 – Phnom Penh
Follow the Phnom Penh itinerary from above.

Day 3 & 4 – Sihanoukville
Follow the Sihanoukville itinerary from above.

Day 5 & 6 – Koh Rong
https://www.flickr.com/photos/ivoposthumus/5904407852
Head out to Koh Rong, which got its name after the legend of a giant King Kong–like ape that once called the island home. It’s a 45-minute trip from Sihanoukville and a great place to relax on the beach or go snorkeling. There are a lot of accommodation options, and it’s a popular spot with backpackers.

Day trips costs around $25 USD and include lunch and snorkeling equipment, but since you have the time, spend a few nights here relaxing and enjoying beach life.

There are also other islands nearby if you want to stay longer and explore, including Koh Rong Samloem, which is becoming something of a backpacker paradise (there’s even a Full Moon Party there now).

Days 7 & 8 – Kep
https://www.flickr.com/photos/blondzilla/12387786174/
In the morning, travel by bus to Kep, which is about two hours from Sihanoukville. This quaint beach town and fishing village is the quiet version of Sihanoukville: a nice place to relax near the ocean but without a party atmosphere. It’s famous for its pepper crab and empty beaches.

Consider taking two full days here. Sure, it’s quite sleepy and there’s not a lot to do, but it’s the perfect place to relax, eat all the delicious crabs the city is famous for, and read a book. You can also spend some time on nearby Rabbit Island (Koh Tonsay) too, a secluded and charming escape from the world if you’re looking to disconnect. Basic bungalows can be rented for under $10 USD per night.

Where to Stay in Kep: Khmer House Hostel – Kep is pretty spread out, so wherever you stay, make sure you rent a bike or scooter. This hostel is a good option as it’s not far from the Crab Market.

Day 9 – Kampot
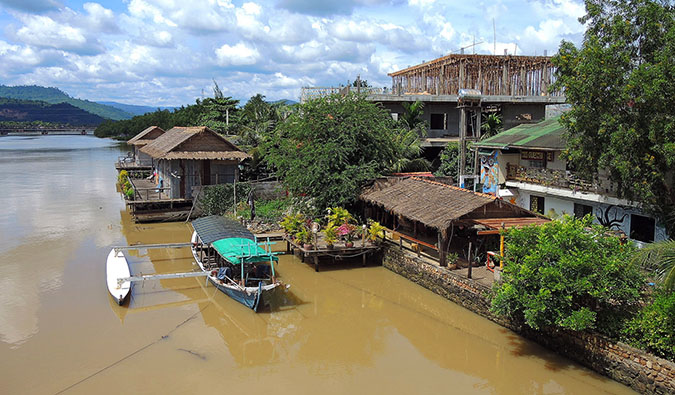
The brown waters of the river in Kampot, cambodia
The southern region of Cambodia is filled with pepper farms where you can learn about the history of the spice, see how it is grown, and pick up what is considered some of the finest pepper in the world.

I’d spend one night in Kampot. It’s another quiet town on the coast. Most people come here to enjoy the scenic riverside views as well as the rolling hills that surround the city. The area used to be a getaway for the French, so you’ll see old French architecture around.

At night, the street near the old bridge is lined with fruit shake vendors. Try a million. The city is famous for them.

Also, if you only do one thing in this entire itinerary, make sure it’s eating the ribs at The Rusty Keyhole. They are some of the best ribs I’ve ever had in my entire life. You have to order them the day before. You’ll also get healthy side of mashed potatoes and coleslaw too. It’s one of the best meals I’ve ever had. I still dream of it.

Where to Stay in Kampot: The Magic Sponge – This is one of my favorite hostels in Cambodia. Make sure you book early, as it tends to sell out. It’s a really nice, relaxed guesthouse where you’ll get your own bed (not a bunk). You’ll feel at home here, and it’s a short walk to the center of town. The dorm rooms are very clean. They also have a little mini-golf course too.

Day 10 – Kampot
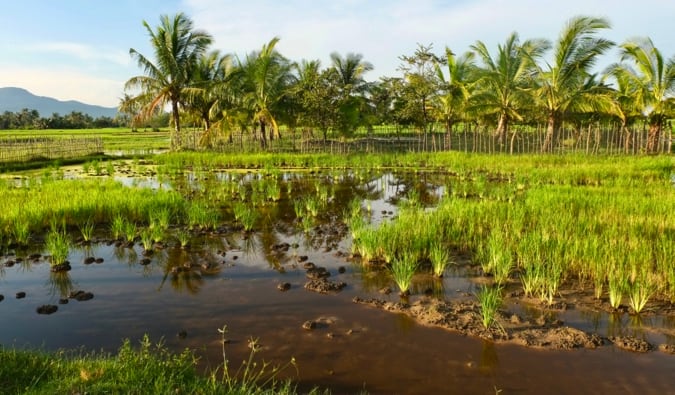
The green fields surrounding Kampot in Cambodia
Today, hire hire a tuk-tuk driver to explore the Kampot area. The Phnom Chhngok Cave Temple has a religious shrine inside, or you can head out and spend the day in Bokor, as Kampot is relatively close to the park.

Days 11, 12, & 13 – Siem Reap
Follow the Siem Reap itinerary from above. Angkor Wat is best seen slowly, so use your days to explore it as much as possible. There are a lot of out-of-the-way temples to visit that are free of crowds.

Day 14 – Siem Reap
https://commons.wikimedia.org/wiki/File:Wat_preah_prom_rath_Horses2.jpg
On your last day in Cambodia, why not take a cooking class? The class sizes tend to be around six people, and you will learn to prepare three different meals, as well as get recipe cards at the end. Prices start around $20 USD per person; local guesthouses can help arrange a class.

What to See and Do in Cambodia: A Three-Week Itinerary

Have even more time for Cambodia? Good! Cambodia has a lot more to it than the major spots on the backpacker trail.

Days 1, 2, & 3 – Phnom Penh and Kirirom National Park
Follow the above suggestions, but also head out to Kirirom National Park for a day trip. This park has all sorts of walking trails, mountain biking trails, waterfalls, and a few lakes. It’s a good place to go to take a break from the city.

The park is around a two-hour drive from the city, so you’ll need to hire a driver for the day. The best way to do this is to find some travelers to join you so you can share a ride, which will cost around $80 for the day.

Days 4, 5, 6, 7, & 8 – Sihanoukville and the Islands
Follow the above suggestions but at a much slower pace!

Days 9, 10 & 11 – Kep and Rabbit Island
Follow the above suggestions for Kep, but head out to Rabbit Island for a rustic island getaway.

Days 12 & 13 – Kampot
Follow the above suggestions!

Days 14, 15, & 16 – Siem Reap
Follow the above suggestions!

Day 17 – Koh Ker
One of the many ancient temples covered in jungle at Koh Ker in Cambodia
For a fun day trip from Siem Reap, head to Koh Ker, located around 2.5 hours from town. Koh Ker was briefly the capital of the Khmer Empire, and many of the temples here are over 1,000 years old. It’s a massive archeological site located in the jungle, and it sees far fewer tourists than Siem Reap.

There are no public buses that go there (the roads were only paved a few years ago), so you’ll have to arrange transportation via your hostel or hotel.

Day 18 – Phnom Kulen
Locals and tourists bathing at the waterfall in Phnom Kulen national park
For another fun day trip, head to Phnom Kulen, considered the country’s most sacred mountain. It’s located just 50km from Siem Reap and offers some amazing jungles, hiking, and picturesque waterfalls where you can take dip to beat the heat. You can easily spend a day here. If you head up to the summit, there are some great views as well as a large reclining Buddha statue. Try to arrive early as the park fills up by lunchtime. Admission to the park is $20 USD.

Day 19 – Battambang
https://www.flickr.com/photos/djou/32662519495
From Siem Reap, you can take a three-hour bus to Battambang. Or try taking a riverboat on Tonle Sap for a unique experience (there is one boat per day, with tickets costing around $20 USD per person).

When you arrive, you’ll discover Cambodia without the tourism. Get familiar with Battambang by exploring the town on foot (or by tuk-tuk). Check out the Phsar Boeung Choeuk and Phsar Naht markets. You’ll also want to visit the gorgeous pagodas and temples, such as Wat Pippitharam (near the Old Market), Wat Bovil, Wat Kandal, and Wat Damreay Sar.

In the evening, check out the Battambang Circus. The show is put on by students at a Cambodian nonprofit arts school, so your donations go to a good cause.

Where to Stay in Battambang: Sophea Hostel – This is a good place to meet locals and make some friends. It’s family-run, and they try to make you feel at home. The facilities are pretty basic, but typical, dorms. There’s a nice garden and sitting area. While there’s no restaurant on-site, there are plenty of nearby options.

Day 20 – Battambang
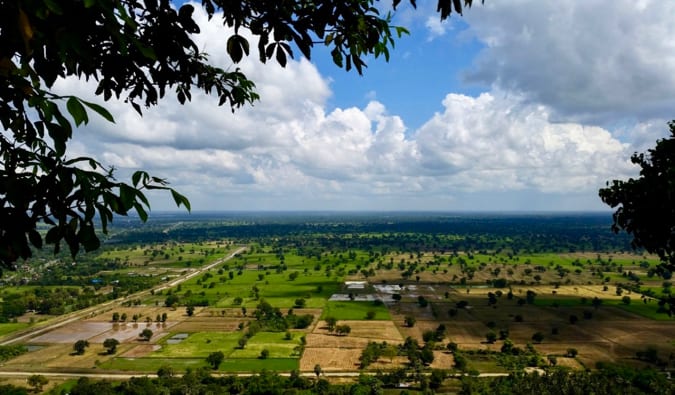
The green farmlands surrounding Battambang in Cambodia
Take it easy this morning by touring the town a bit more on foot. Check out the colonial architecture along the waterfront and the governor’s residence. This building from the early 1900s is not open, but you can marvel at the exterior.

While you’re wandering, don’t miss the Art Deco central market building and the Victory swimming pool (where you can take a dip if you’re in the mood). You may want to visit the Battambang Museum; admission is just $1 USD, and you’ll learn a lot about the history of the area.

After lunch, you should grab a tuk-tuk and head a bit out of town to check out Phnom Sampeu. Take about an hour to climb to the monastery on the hill. You’ll also find some caves in the area with Buddhist temples in them. There’s also another cave at the foot of Phnom Sampeu; this is where you want to be around dusk, when millions of bats fly out of the cave in search of food. It’s an incredible sight!

Day 21 – Siem Reap or Phnom Penh
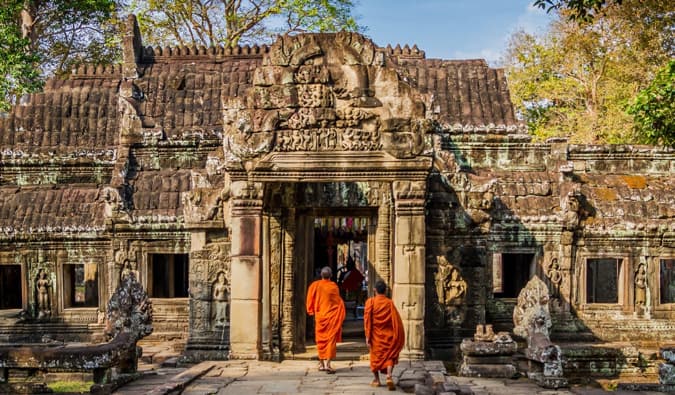
Two monks in orange robes walking in a temple in Cambodia
Make your way back to one of these towns, depending on where your flight is leaving from. Enjoy the bus ride, knowing it’s your last in Cambodia (at least for now)!

***

I always love my time in Cambodia. It lacks the polish of Thailand, making travel here a little more rustic and challenging.

But more amazing than any of the country’s sights and activities are the people. I’ve always found them to be incredibly welcoming. Even with so much darkness clouding their recent history, Cambodians always go above and beyond, making any trip here a memorable one.

But don’t take my word for it. Come and see this incredibly country for yourself.

And let these suggested Cambodia itineraries help you plan your trip!

Book Your Trip to Cambodia: Logistical Tips and Tricks

Book Your Flight
Find a cheap flight by using Skyscanner or Momondo. They are my two favorite search engines because they search websites and airlines around the globe, so you always know no stone is being left unturned.

Book Your Accommodation
You can book your hostel with Hostelworld. If you want to stay somewhere other than a hostel, use Booking.com as they consistently return the cheapest rates for guesthouses and cheap hotels. I use them all the time. My favorite places to stay are:

  • Sla Boutique Hostel (Phnom Penh) – This is a classy hostel not far from restaurants, bars, and attractions. It’s clean, and the beds are really comfy!
  • Topsky Hostel (Siem Reap) – This hostel is in a quiet area and offers basic accommodation. The staff will help you arrange a tuk-tuk and activities.
  • Monkey Republic (Sihanoukville) – This hostel is a happening place and always good for a aprty. They have a bar, restaurant, and pool making it really easy to realx and meet people. The staff is really friendly, and they can also organize some day trips for you too.
  • Sophea Hostel (Battambang) – This is a family-run hostel and they doo a good job of making you feel at home. The facilities are basic but there’s a nice garden and sitting area. While there’s no restaurant on-site, there are plenty of nearby options.

Don’t Forget Travel Insurance
Travel insurance will protect you against illness, injury, theft, and cancellations. It’s comprehensive protection in case anything goes wrong. I never go on a trip without it, as I’ve had to use it many times in the past. I’ve been using World Nomads for ten years. My favorite companies that offer the best service and value are:

Looking for the best companies to save money with?
Check out my resource page for the best companies to use when you travel! I list all those I use to save money, and I think they will help you too!

Want More Information on Cambodia?
Be sure to visit our robust destination guide on Cambodia for even more planning tips!

Photo credit: 14, 15

The post Backpacking Cambodia: 3 Suggested Itineraries for Your Trip appeared first on Nomadic Matt's Travel Site.
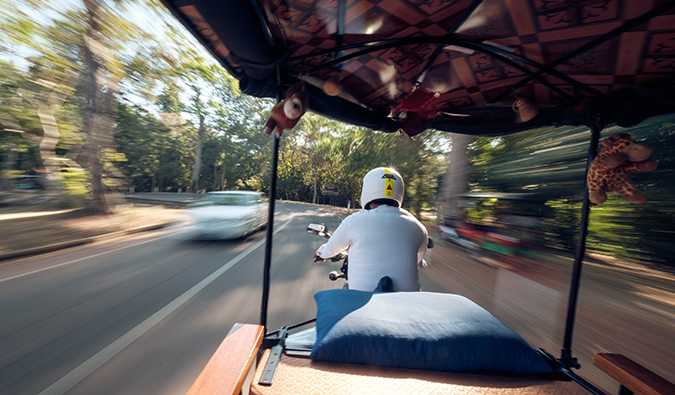
How to Get Around Southeast Asia on the Cheap

view from the back of a tuk tuk in Southeast AsiaPosted: 2/28/2019 | February 28th, 2019
Southeast Asia may be a huge region — but it’s super easy to get around.

It’s well-traveled (backpackers have been following “the banana pancake trail” since the late ’60s), and there’s an extensive network designed to ensure that you can easily get from A to B.

In Hanoi and need to get to Bangkok? In Vientiane and want to go Malaysia? Or Ko Samui? No problem. Someone can arrange that.

But what’s the best way to get around Southeast Asia on a budget?

How can you go from point A to point B in the most efficient and easiest manner?

Here’s how you can travel around Southeast Asia on the cheap, with example prices and estimated travel times.

Get Around Southeast Asia By Flying

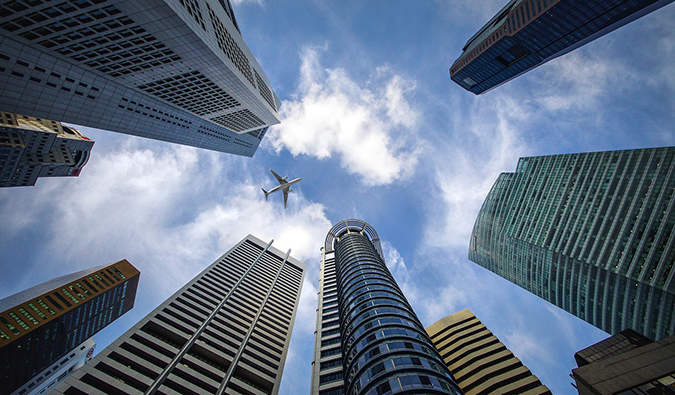
an upward view of an airplane between skyscrapers in Singapore
This is the quickest but most expensive way to get around Southeast Asia. There are a lot of budget airlines (like Ryanair or EasyJet in Europe) in the region: Scoot (merged with Tigerair), Jetstar, and AirAsia are the biggest. Nok Air has a lot of flights within Thailand, and VietJet Air is popular in Vietnam. Lion Air serves Indonesia, but its safety record is really spotty and I would not fly them.

Here are some sample prices for some of the biggest routes:

  • Bangkok to Singapore – $55 (one way), $120 (round-trip)
  • Phuket City to Vientiane – $95 (one way), $180 (round-trip)
  • Ho Chi Minh City to Bangkok – $48 (one way), $108 (round-trip)
  • Bali (Denpasar) to Kuala Lumpur – $75 (one way), $110 (round-trip)
  • Siem Reap to Hanoi – $125 (one way), $169 (round-trip)
  • Jakarta to Kuala Lumpur – $28 (one way), $56 (round-trip)
  • Manila to Ho Chi Minh City – $80 (one way), $125 (round-trip)
  • Yangon to Manila – $107 (one way), $226 (round-trip)
  • Yangon to Bangkok – $45 (one way), $82 (round-trip)

If you book early, you can save on fares, as most of the airlines offer deeply discounted fare sales all the time, especially Air Asia. The best places to find cheap flights are Momondo and Skyscanner.

Keep in mind two things, though:

  1. First, budget airlines all fly from smaller, more out-of-the-way airports, so be prepared to take buses or taxis there (and plan for traffic).
  2. Second, all these airlines make their money by charging fees for everything, so expect baggage fees, credit card “convenience” fees, check-in fees, fees on fees, etc., etc.! If the fees add up, it can often be cheaper to fly one of the larger, more traditional air carriers, especially when you consider the main airport might be more centrally located.

All in all, I only recommend flying if you are pressed for time or find a super cheap deal.

Get Around Southeast Asia By Local or Tourist Bus

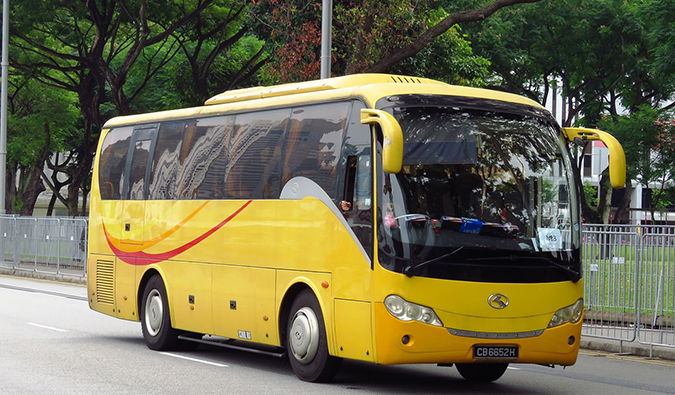
a yellow tourist coach bus in Southeast Asia
The easiest and cheapest way to travel around Southeast Asia is by bus. Buses will take you anywhere you want to go, no matter how far.

Buses are generally run by a plethora of small operators (there is no version of Greyhound here). You simply go with the operator that services the route you want to travel or with the company the tourist agency or guesthouse set you up with.

In Southeast Asia, you don’t have to plan ahead that much either. You simply show up at the bus station and buy your ticket! They use a first-come, first-serve basis but are rarely full. You don’t need to book them in advance or online — although, if I know where I’m going, I often book my bus the day before simply as a precaution. In all my years traveling this region, I’ve never shown up and been turned away.

Here are some sample fares and travel times for bus routes in Southeast Asia (in USD):

  • Bangkok to Chiang Mai – $17 (10 hours)
  • Bangkok to Pattaya – $4.75 (3 hours)
  • Chiang Mai to Chiang Rai – $7.17 (3:40 hrs)
  • Phnom Penh to Siem Reap – $12 (5:30 hrs)
  • Kuala Lumpur to Singapore – $12.23 (5 hrs)
  • Vientiane to Luang Prabang – $27 (10 hrs)
  • Da Nang to Hanoi – $13.80 (14 hrs)
  • Sihanoukville to Phnom Penh – $11 (4 hrs)
  • Kuta Beach to Ubud – $6 (1 hr)
  • Puerto Princesa to El Nido – $12 (5 hrs)
  • Yangon to Bagan – $18.50 (9 hrs)
  • Hanoi to Halong Bay – $7.35 (4 hrs)

Moreover, the backpacker trail in Southeast Asia is so well established that there is a very well-oiled “tourist bus” system here. (Usually, when you book buses from tourist agencies or guesthouses, they put you on these tourist buses.) These buses will pick you up at your accommodation or have a set meetup point in the tourist area and take you directly to your next destination.

For example, if you need to go from Bangkok to Chiang Mai, you’d buy a ticket, meet the bus (probably on Khao San Road), and enjoy the night ride up to Chiang Mai with other travelers. No stops at other bus stations — just a straight shot to Chiang Mai.

And while tourist buses are very convenient, they are also usually about 25% more expensive than the buses locals use. They generally cost $5-8 USD for a 5-6-hour journey; overnight buses are $22 USD or more depending on distance.

Get Around Southeast Asia By Backpacker Bus

Stray Asia tour bus; photo from Stray Asia
There are two organized backpacker specific bus companies that serve Asia: Bamba Experience and Stray Asia. These are hop-on-hop-off buses that travel set routes across the continent.

Bamba Experience’s flexible passes start at around $600 USD for 15 days. Stray Asia’s pass is about $1,836 for a minimum of 40 days.

Personally, I’m not a huge fan of these services. You’re paying for flexibility, but it’s easy to get around the region as well as meet people, so I would skip this method of travel. Even if you’re a first-time traveler, the tourist buses can do everything these tours can do for you.

Get Around Southeast Asia By Train

a train hugging the cliff side in Kanchanaburi, Thailand
Train service in Southeast Asia is basically nonexistent other than in Thailand, the only country that has an extensive train system around the country (and onward to Singapore), and Vietnam, which has a train along the coast, though it is slow and expensive compared to the bus (1,445,445 VND/$62 USD from Hanoi to Ho Chi Minh City instead of 695,865 VND/$30 USD).

Train prices are determined by distance and class, so the farther you go, the more you pay. Night trains with sleeper cars are more expensive than day trains: the night train to Chiang Mai from Bangkok takes 12 hours and costs 965 THB ($29 USD) for a sleeper seat, but that same train during the day is 230 THB ($7 USD).

You can travel by train between Singapore, Johor Bahru, Kuala Lumpur, Penang, and Bangkok as well. It’s a long journey that will take you over a day to get there, but you can find fares for as little as $80 USD. If you’re a train enthusiast, it’s one of the most classic rides out there. If you have the time, I highly recommend the experience.

Myanmar has train service but it’s very limited. There is no website for Myanmar Railways, but the ministry of rail transportation has a schedule (don’t depend on this though — you’re better off finding out exact times at a station). You can also use 12go.asia to look up routes and buy tickets. There are trains every day between Yangon and Mandalay, with stops in Bago, Taungoo, Naypyitaw, and Thazi. This entire 15-hour route costs about 4,600 K ($3 USD) for an ordinary seat and 12,750 K ($8 USD) for sleeper class. There are a handful of other routes as well, like Yangon to Inglee Lake via Thazi.

In Indonesia, the main cities of Java (Jakarta, Bandung, Surabaya, Probolinggo (for Mount Bromo), and Banyuwangi (the ferry terminal for Bali)) are well linked by train, including. Economy class to Jakarta to Surabaya takes 15 hours and costs about 104,000 IDR ($7 USD), while a 9-hour executive-class trip can cost up to 1,250,000 IDR ($90 USD). Surabaya to Probolinggo (for Mount Bromo) takes 2-3 hours and costs 29,000 IDR ($2 USD) for economy or 150,000 IDR ($11 USD) for executive class. Surabaya to Banyuwangi (for Bali) takes 6-7 hours and costs as little as 56,000 IDR ($4 USD) for economy or 190,000 IDR ($13.50 USD) for executive class. You can reserve your tickets at tiket.com.

Get Around Southeast Asia By Car/Motorbike

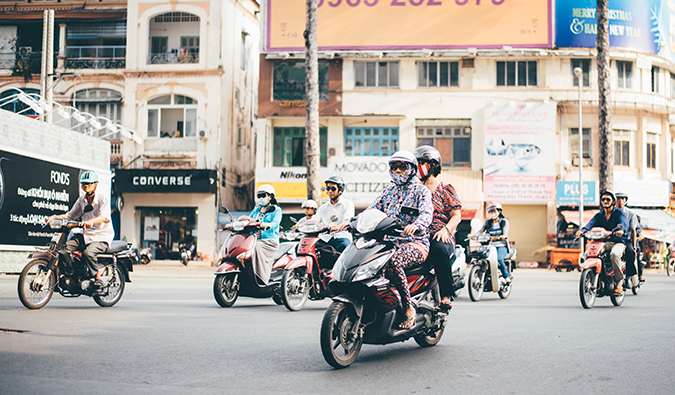
a group of locals riding motorbikes in Vietnam
I don’t recommend renting a car. Rental cars are expensive and the roads here are nuts. I would never drive around the region.

However, a lot of people motorbike around the area. I don’t know much about this, but Travelfish does. He’s the guru on this. Check it out here.

Get Around Southeast Asia By Boat/Ferry

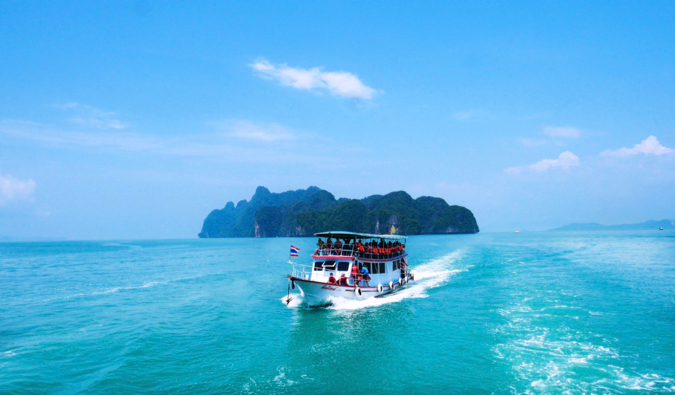
a ferry full of travelers in southeast asia
While this won’t be your main way of getting around, it will definitely come into play in certain countries. If you’re exploring the islands of Thailand, for example, you’ll need to rely on boats and ferries. And if you’re backpacking around Indonesia or the Philippines, ferries will be the cheapest way to island-hop (but definitely not the fastest!).

It’s worth noting that ferries in Southeast Asia don’t often adhere to Western safety standards and lack of life jackets is an issue. Some people recommend staying on the top deck so it’s easier to quickly leave the boat if necessary.

While it’s not necessary to book in advance, it’s a good idea during peak season or on more popular routes to book your tickets the day before you plan to travel to make sure you have a spot. You can buy tickets on the ferry company’s website or via a ticket agent like 12go.asia. However, every agent or hostel or hotel can get you a ferry ticket too. It’s really simple!

Here are a few sample routes and prices to help you plan:

  • Bali (Padang Bai) to Lombok – $5 (one way)
  • Bali to the Gili Islands – $30 (one way)
  • Koh Tao to Koh Samui – $16 (one way)
  • Sihanoukville to Koh Rong – $25 (round-trip)
  • Manilla to Puerto Princesa – $30 (one way)

You might also consider doing a multiday cruise on popular waterways like the Mekong River or Halong Bay. On the Mekong River in Laos, slow boats from Huay-Xai will drop you off in Luang Prabang. Slow boats take 2-3 days, stopping at guesthouses for nightly accommodation. Prices will vary depending on the quality of your tour company, but a decent tour will run you around 1,000,000 LAK ($116 USD).

Halong Bay tours from Hanoi start around 850,000-1,403,377 VND ($35-60 USD) for two-day trips and increase exponentially from there.

Getting Around Towns on the Cheap

a public bus in motion in Bangkok
Local buses are really your best and cheapest option when you’re traveling in town as well. Fares typically cost less than $1 (and even less if you buy multi-trip passes). All of the towns you’ll visit will have reliable, affordable public bus systems.

In some of the bigger cities (Singapore, Bangkok, Kuala Lumpur), you’ll even find subways and tram systems. Jakarta and Hanoi are working on building their subway systems, but buses are still the best option in those places for now.

I normally advise budget travelers to skip taxis because they are way too expensive. But in Southeast Asia, you don’t have to always stick to this rule. Taxis and tuk-tuks (small shared taxis with no meters) are options here. They require a bit of haggling and cost more than public transportation, but they are clearly more convenient when you’re in a jam or not yet accustomed to an area.

In Singapore and Indonesia, taxi drivers do put on the meter. In Bangkok, you can get taxi drivers to use the meter, but if you’re hailing one in a tourist area, he might try to avoid using it. In Vietnam, the meter is usually rigged, but if you use a reputable company like Mai Linh, you won’t have any problems.

Grab (an Uber offspring) is a household name in Southeast Asia. It, too, is convenient, but it sometimes costs even more than a taxi. Gojek in Indonesia is a similar option. Be forewarned: If you order a Grab or Gojek, you might wind up on the back of a motorbike!

How Long Does it Take to Get Around Southeast Asia?

a monk in orange robes boarding a plane in Asia
Here is a distance and travel-time table of how long it takes to get around Southeast Asia.

Route
Distance
(km/miles)
Air (hrs)
Bus (hrs)
Rail (hrs)
Phnom Penh –
Sihanoukville
214/133
1
5
7
Phnom Penh –
Ho Chi Minh City
230/115
1
6
N/A
Hanoi –
Vientiane
800/497
1:10
22
16
Chiang Mai –
Bangkok
688/428
1:20
10
14:40
Bangkok –
Phuket
840/525
1:25
13
N/A
Kuala Lumpur –
Singapore
350/217
1
7
7
Phuket –
Kuala Lumpur
964/599
1:30
18
N/A
Bali –
Lombok
75/46
0:30
4
(via ferry)
N/A
Yangon –
Bagan
626/390
1:15
9
17.5
Jakarta –
Bali
1,173/729
1:50
30
12
(ferry
terminal)
Vang Vieng –
Luang Prabang
183/114
N/A
6
N/A
Manila –
El Nido
613/380
1:20
10
(ferry
terminal)
N/A
Manila –
Boracay
442/275
0:55
3
(ferry
terminal)
N/A

***

In short, Southeast Asia is pretty easy to get around: take the train as often as you can in Thailand, take the train in Vietnam if you have the time, and take buses everywhere else. If you’re pressed for time, take the night trains or fly. And if you find a good flight deal, definitely fly!

Simple and easy.

As long as you do that you’ll be able to get around Southeast Asia on a budget and make the most efficient use of your time and money!

Book Your Trip to Southeast Asia: Logistical Tips and Tricks

Book Your Flight
Find a cheap flight by using Skyscanner or Momondo. They are my two favorite search engines because they search websites and airlines around the globe, so you always know no stone is being left unturned.

Book Your Accommodation
You can book your hostel with Hostelworld as they have the largest inventory. If you want to stay somewher eother than a hotel, use Booking.com, as they consistently return the cheapest rates for guesthouses and cheap hotels. I use them all the time.

Don’t Forget Travel Insurance
Travel insurance will protect you against illness, injury, theft, and cancellations. It’s comprehensive protection in case anything goes wrong. I never go on a trip without it, as I’ve had to use it many times in the past. I’ve been using World Nomads for ten years. My favorite companies that offer the best service and value are:

Looking for the best companies to save money with?
Check out my resource page for the best companies to use when you travel! I list all the ones I use — and I think they will help you too!

Looking for more information on visiting Southeast Asia?
Check out my in-depth destination guide to Southeast Asia with more tips on what to see and do, costs, ways to save, and much, much more!

Photo credit: 4

The post How to Get Around Southeast Asia on the Cheap appeared first on Nomadic Matt's Travel Site.

18 Free and Cheap Things to Do in Singapore

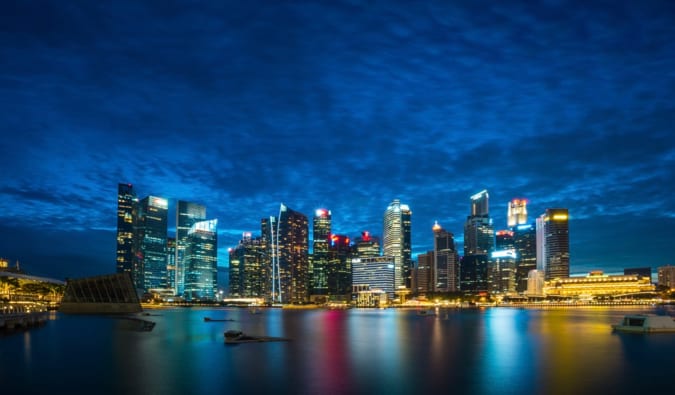
the skyline of Singapore lit up at night
Updated: 2/27/2019 | February 27, 2019

Singapore is an expensive place to visit. There’s no way around it. The small city state is priced relative to the United States, which is a lot more expensive than its neighbors!

On a small stop-over trip, this isn’t a problem.

But on a big trip through the region, a trip into Singapore can elicit sticker shock, and it can turn people away if they’re trying to do the area on the cheap. If you still want to visit this country, though, there are still many ways to travel around Singapore on a budget.

Singapore has many free and cheap things to do when you vsiit that that will allow you to make the most of this big city!

Here’s a list of my favorite cheap and free things to do in Singapore!

1. Cool Off in the Underground Malls

A busy underground mall in Singapore
The best places to cool off in this very hot city are the underground malls where the A/C’s cranking. You’ll be able to move around most of the city and never expose yourself to the heat and humidity. Since it gets cool at night, it can save you from having to pay extra for A/C at your hotel or hostel. Plus, you can spend your afternoon wandering underground Singapore without spending any money.

2. Eat Cheap Food in Little India

Food and spices in Little India in Singapore
Singapore has some great food, but many of the restaurants are expensive. However, one of the best places to eat is the area of Little India, where great Indian meals cost as little as 5 SGD. Make sure you find the places where you can eat with your hands! They’re the most authentic and local places. You’ll probably be the only Westerner in there, though, so be prepared for people to stare. Eating at these places was still the most fun I had in Singapore.

Make sure you stop off at the Tekka Center, a hawker center with Indian clothing, groceries, and food. The food here is cheap and delcious and makes for an authentic Little India experience.

For a sit-down restaurant experience, head to Ananda Bhavan. It’s the country’s oldest vegetarian restaurant and is definitely worth a visit for some delicious Southern Indian cuisine. Even if you’re not a vegetarian you’ll still love it!

3. Eat Cheap Food in Chinatown

Art and trinkets in Singapore's Chinatown
Another great place to eat cheap food is Chinatown. The dim sum here is great, most everything is in Chinese, the hawker food is also good, and there are a few cool temples here too. This is a wonderful place to not only eat but to also wander around. You’ll be able to cut down a lot of your food budget by sticking to the hawker stalls here and in Little India.

One of those food stalls is Hong Kong Soya Sauce Chicken Rice and Noodle (aka Hawker Chan), the world’s most affordable Michelin-starred restaurant. You can order a world-class dish here for under $2 USD. Be sure to eat here! Get here early as the line gets extremely long!

Tian Tian Hainanese Chicken Rice is another Michelin-starred hawker stall worth a visit if Hawker Chan’s is too busy. Like Hawker Chan’s, it’s located in the Maxwell Hawker Center.

In addition to exploring the Maxwell Hawker Center, you’ll want to also check out the Chinatown Complex Food Center and Chinatown Food Street. Those are the best places to find some of the cheapest and most delicious food in the city!

4. Eat Out for Lunch

A steaming bowl of delicious ramen in Singapore
If you’re looking for a nice place to sit down and eat, then the best time to eat at Singapore’s famed restaurants is during lunch when restaurants offer 20% off, making them a great deal. The set lunches will give you dinner food at a discount and allow you a bit more variety in what you’re eating. Make sure to check out the restaurants in the underground mall, where you’ll find even more lunch specials.

5. Walk Around the Gardens

A pond in the botanical garden in Singapore
The Botanic Gardens are free and are a nice place to walk around—especially in the mornings and evenings when Singapore’s tropical weather cools down a little. Early in the morning, locals practice t’ai chi on the lawn, and there are often free concerts on weekends.

6. Combine the Singapore Zoo and Night Safari

A lone tiger at the Singapore zoo The Singapore Zoo is a must-see. It’s an open-air zoo, which is great because animals aren’t locked up in tiny cages. It’s actually one of the best zoos I’ve ever been to. They also offer a night tour in a different section of the park where you get to see the nocturnal animals. These activities aren’t very cheap, but if you combine them together, you’ll save a lot of money. It’s worth the price.
80 Mandai Lake Rd, +65 6269 3411, wrs.com.sg/en/singapore-zoo. Open daily from 8:30am-6pm. Admission to the zoo is 35 SGD for adults and 23 SGD for kids while the night safari is 47 SGD for adults and 31 SGD for kids. A combination ticket for the zoo and night safari is 68 SGD for adults and 48 SGD for kids.

7. Hit the Beach

Sentosa Beach on a sunny day in Singapore
If you need an escape from the busy metropolis, head to Sentosa Island. There, you can kick back and relax on the beach. There are actually 3 beaches to choose from here, depending on what you’re looking for. Siloso beach is where you’ll want to go for activities, Tanjong beach is a great spot to chill and enjoy a drink, and Palawan beach is where you’ll go if you’re traveling with kids. While you won’t be getting the beach experience you’d find in Thailand (there are tons of cargo ships in the water here!) it’s still a great place to escape for a day and soak up some rays.

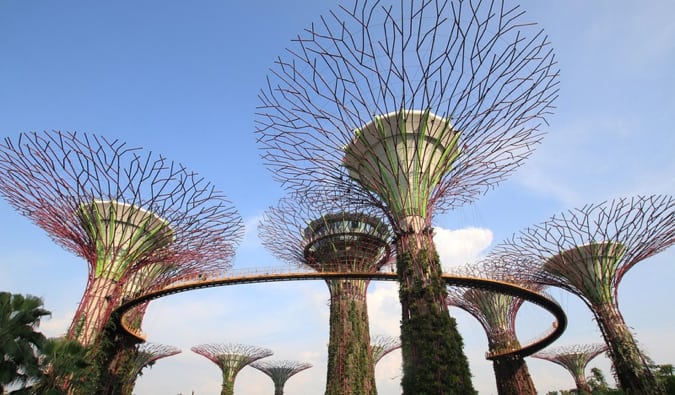
8. See the Supertrees

The massive Supertrees at Gardens by the Bay in Singapore
Gardens by the Bay is a 250-acre nature park build on reclaimed land. It’s famous for its massive supertrees, 25-50m-tall vertical gardens that look like massive trees. The supertrees are home to all sorts of exotic plants and ferns and make for a stunning sight. While you have to pay to explore the conservatories, admission to the supertree garden is free.

9. Visit the National Museum of Singapore

the National Museum of Singapore at night
While admission to the museum isn’t free, they do offer daily free tours which really makes a visit here worthwhile. This is the oldest museum in the country, having opened in 1849. The museum covers the history of the country, making it a great place to learn more about the country and how it came to be.

93 Stamford Road, +65 6332-3659, nationalmuseum.sg. Open daily from 10am-5pm. Admission is 15 SGD for adults and 10 SGD for students and seniors. Free tours are available at 11am and 2pm on weekdays and 11am, 1pm, 2pm, and 4pm on weekends.

10. Hike the MacRitchie Treetop Walk

Green trees and jungle surrounding the MacRitchie Treetop Walk in Singapore
The MacRitchie Trails cover over 11km of pathways around the largest reservoir in the country. It’s a place where the locals head for a run or a hike, and it’s a great place to get out and stretch your legs if you need to escape the city. Part of the trail includes a 250m aerial suspension bridge, which offers some nice views of the surrounding area. You can rent kayaks and canoes there, as well, and if you’re lucky you might spot one of the rare flying lemurs that call the park home!

MacRitchie Reservoir, +65 1800 471 7300, nparks.gov.sg. Open Tuesday-Friday from 9am-5pm and 8:30am-5pm on weekends. Admission is free.

11. See St Andrew’s Cathedral

Saint Andrew's Cathedral in Singapore
This is the largest cathedral in the country, dating back to the 1850s. The cathedral was built in the Neo-Gothic style, and it was the first Anglican evangelical outreach in the country. The cathedral’s choir is actually the oldest musical institution in the country too. During WWII, it was used as a makeshift hospital until the Japanese invaded.

11 St Andrew’s Road, +65 6337-6104, cathedral.org.sg. Open from Monday-Saturday from 9am-5pm. Tours are free though they must be booked in advance.

12. Snap a Photo with a Merlion

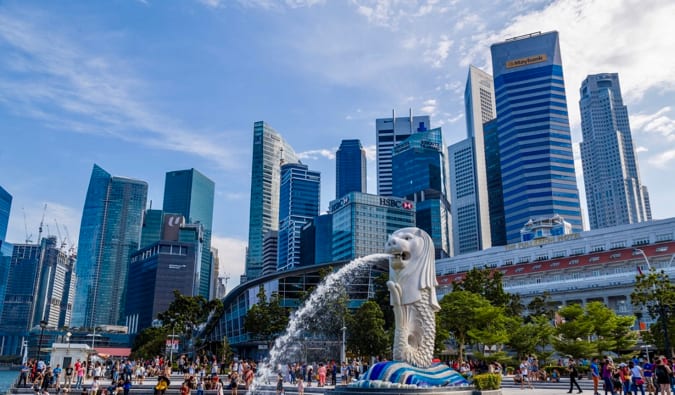
The famous white Merlion fountain in busy Singapore
The merlion is a mythical creature that has the head of a lion and the body of a fish. It’s the mascot of the country and often considered the personification of Singapore itself. There’s a statue of a merlion in Merlion Park (near the Central Business District) that you can check out and snap a photo with. (There are actually 5 official merlion statues around the city, though the 2 in Merlion Park are the most famous).

13. Go Stargazing

A beautiful night sky full of stars
Science Centre Singapore offers free stargazing every Friday (weather permitting) between January and November. This is a really cool activity and makes for a great educational experience for adults and children alike. Just keep in mind that there is limited space, so be sure to arrive by 7:30pm to claim a spot.

15 Science Centre Road, +65 6425-2500, science.edu.sg. Stargazing is every Friday from 7:45pm-10pm. Check their website for the most up-to-date details.

14. Take a day trip to Chek Jawa

A beautiful at the beach at Chek Jawa in Singapore
This wetland nature reserve is located on an island a short ferry ride away from the city. There’s a winding boardwalk you can explore as well as a large viewing tower you can climb to take in the panorama. Bicycles are available for rent outside the park as well, in case you don’t want to hike. The area was originally slated for redevelopment but the locals protested the decision and now it’s one of the last bastions of natural habitat in the area.

Pulau Ubin, +65 6542-4108, nparks.gov.sg. Open daily from 8:30am-6pm. Admission is free.

15. Explore the Singapore Art Museum

The facade and parking lot of the Singapore Art Museum in Singapore
The museum is home to the world’s largest collection of modern Southeast Asian art. Modern art isn’t my favorite style, but there were plenty of insightful and imaginative pieces here to keep you entertained. They also have regular guided tours in English, which definitely makes a visit worthwhile. If you want to save money, be sure to visit on Friday evening when admission is free!

8 Queen St, +65 6589-9580, singaporeartmuseum.sg. Open Saturday-Thursday from 10am-7pm and Fridays from 10am-9pm. Admission is 10 SGD per person, though there is free entry on Fridays from 6pm-9pm.

16. Visit Haw Par Villa

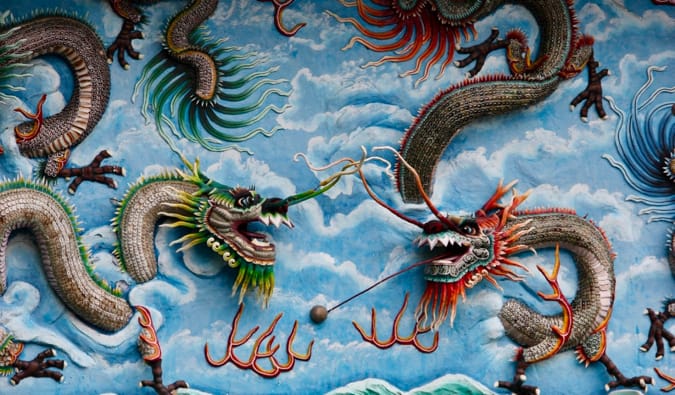
Dragon artwork at Haw Par Villa in Singapore
Also known as Tiger Balm Gardens, this theme park contains over 1,000 statues from Chinese folklore and mythology. The most popular section of the park is a depiction of the Ten Courts of Hell, an exhibit that shows what hell is like in Chinese mythology. The park was recently updated and renovated and is worth taking a stroll through.

262 Pasir Panjang Rd, +65 6773 0103, hawparvilla.sg. Open daily from 9am-7pm. Admission is free.

17.Buddha Tooth Temple

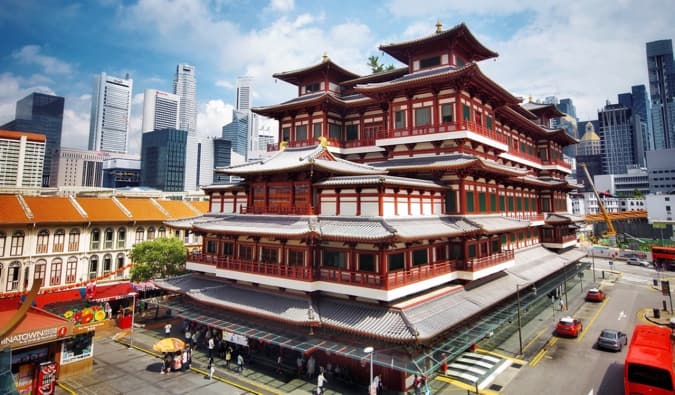
The massive Buddha Tooth Temple in central Singapore
Located in Chinatown, this Buddhist temple is also a museum that is home to a tooth of the original Buddha. The four-story building was built in the early 2000s though it imitates architecture from the Tang Dynasty of China. The museum is home to one of almost a dozen “tooth relics” in the world, and while its legitimacy can be debated it’s still a cool temple to visit and explore.

288 South Bridge Rd, +65 6220-0220, btrts.org.sg. Open daily from 9am-6:30pm. Admission is free.

18. Sungei Buloh Wetland Reserve

The Sungei Buloh Wetland Reserve in Singapore
This wetland is an ASEAN Heritage Park and another great place to escape the urban sprawl of Singapore. It was the first wetlands in Singapore to be made into a reserve due to its importance for migratory birds in Asia. There are dozens of bird species that call the park home, and there is also a family of otters you can spot playing in the water if you’re lucky!

301 Neo Tiew Cres, +65 6794-1401, nparks.gov.sg/sbwr. Open daily from 7am-7pm. Admission is free.

***

Singapore may not be the cheapest city in the world, but there are still some ways to make it less of a burden on your wallet. By eating cheap, walking, and taking advantage of discounts, you can easily do Singapore without busting your wallet!

Do you have any tips on how to visit Singapore on a budget? Leave them in the comments!

Book Your Trip to Singapore: Logistical Tips and Tricks

Book Your Flight
Find a cheap flight by using Skyscanner or Momondo. They are my two favorite search engines because they search websites and airlines around the globe so you always know no stone is left unturned.

Book Your Accommodation
You can book your hostel with Hostelworld. If you want to stay somewhere other than a hostel, use Booking.com as they consistently return the cheapest rates for guesthouses and cheap hotels. I use them all the time. My favorite places to stay are:

  • Coral Hostel – This is a quiet hostel with fast WiFi and free coffee/tea as well as a free all day breakfast!
  • Dream Lodge – This is a cool hostel with comfy beds that offer lots of privacy. There are lockers and plenty of outlets, and each bed has a curtain, which I really appreciate as a light sleeper!

Don’t Forget Travel Insurance
Travel insurance will protect you against illness, injury, theft, and cancellations. It’s comprehensive protection in case anything goes wrong. I never go on a trip without it as I’ve had to use it many times in the past. I’ve been using World Nomads for ten years. My favorite companies that offer the best service and value are:

Looking for the best companies to save money with?
Check out my resource page for the best companies to use when you travel! I list all the ones I use to save money when I travel – and I think will help you too!

Want More Information on Singapire?
Be sure to visit our robust destination guide on Singapore for even more planning tips!

Photo Credit 8, 10, 11, 12, 14, 15, 19, 20

The post 18 Free and Cheap Things to Do in Singapore appeared first on Nomadic Matt's Travel Site.

How to Get Around Thailand on the Cheap in 2019

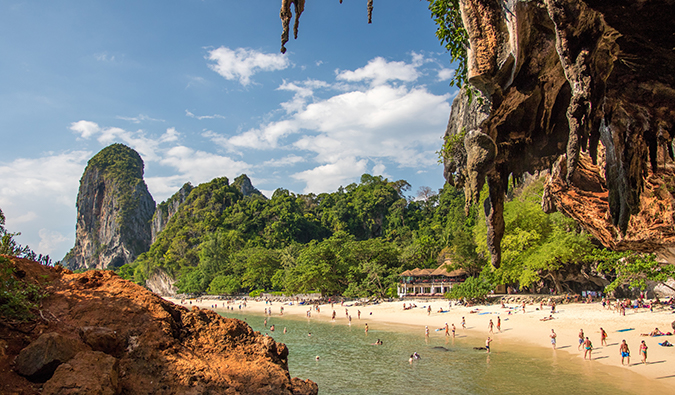
a sunny beach view in Thailand framed with rocky outcrops
Posted: 2/25/2019 | February 25, 2019

Thailand is one of the most popular backpacker destinations in Southeast Asia.

It’s also my favorite.

Of course, I’m biased.

Thailand was where I decided to quit my job and travel the world. I lived there for two years. I ran tours there. I speak the language. I feel at home there.

But that aside, Thailand remains popular some thirty years after the first hippies arrived on the “banana pancake trail” for a simple reason: it’s awesome.

The succulent food, the warm people, the postcard-perfect beaches, the lush jungles, the hot weather — Thailand is simply a wonderful place.

That said, Thailand is also a pretty big country.

What’s the best way to get around Thailand?

Well, how you will get around Thailand depend greatly on how long you’re staying. You have options!

So what should you do?

Here’s a breakdown of the best ways to travel around Thailand (including travel times) regardless of budget or the length of your stay in the country:


Getting Around Thailand By Flying

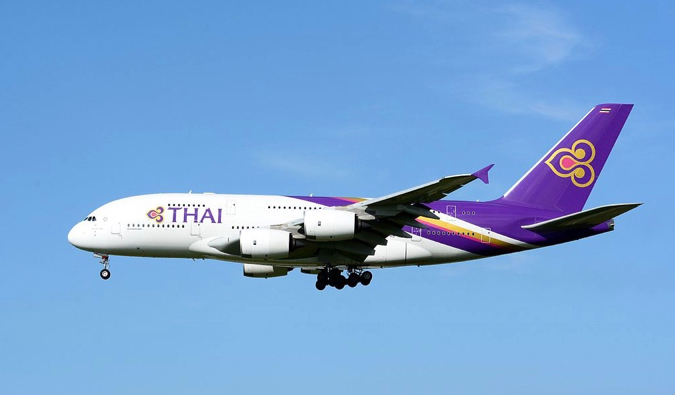
a Thai Airways plane taking off in Thailand
Flying is obviously the most expensive but quickest way to get around. You can get pretty much anywhere in the country in two hours or less, making flying the perfect choice for people who are rushed for time.

Thai Airways is the largest (and costliest) carrier, but there are numerous budget airlines, like Thai Smile, Bangkok Airways, Thai Lion, AirAsia, and Nok Air. But avoid some of the smaller budget airlines like Orient Thai, as their safety records are pretty spotty.

Flights around Thailand generally cost 1,400-6,600 THB ($44-200 USD). Flights to the islands tend to be costlier than those between large cities like Bangkok and Phuket. Flights to Ko Samui are always more expensive than anywhere else, thanks to monopoly pricing by Thai Airways and Bangkok Airways.

Here are some sample fares (as of February 2019) so you can get an idea of how much flights cost:

  • Bangkok to Chiang Mai – 780 THB/$25 USD (one way), 1,560 THB/$50 USD (round-trip)
  • Bangkok to Phuket – 735 THB/$30 USD (one way), 1,311 THB/$42 USD (round-trip)
  • Bangkok to Koh Samui – 3,715 THB/$119 USD (one way), 7,274 THB/$233 USD (round-trip)
  • Chiang Mai to Phuket – 1,561 THB/$50 USD (one way), 2,997 THB/$96 USD (round-trip)

If you book early, you can save on fares as the budget carriers usually offer around 30-50% off tickets when they have sales — and they always have sales (especially Air Asia).

Keep in mind that each airline has different baggage fees and policies – budget airlines typically charge extra for like credit card processing (the stupidest of all fees), baggage fees, and preferred seating.

Getting Around Thailand By Train

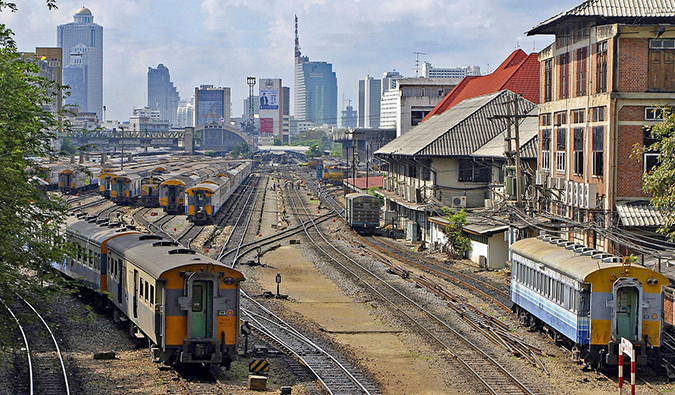
a busy train yard in Bangkok, Thailand
Thailand is one of the few countries in the region with a decent rail network. It covers 2,796 miles and is one of the best and cheapest ways to get around the country.

There are three classes of travel: first class is the most expensive and is available only on night trains. Second class is quite comfortable and has softer seats, as well as air-conditioned cars. Third class is bare-bones cars, with hard seats and no A/C. However, these are the cheapest seats around! (I actually like third class, though, as you meet more interesting people and there are always vendors coming on and off selling delicious and cheap food.)

Trains here move very, very slowly. The Chiang Mai-to-Bangkok night train — a distance of only 430 miles — takes 12 hours.

Day trains are even worse, as there are frequent stops and waiting at stations for reasons I’ve never figured out.

There’s no high-speed train in this country so don’t be in a rush if you’re traveling Thailand by train!

That said, I love traveling by train in Thailand if I’m not in a rush. The trains are spacious, there’s always food and drinks available, most of the cars have A/C, vendors get on and off at each stop to sell meals, fruit, or drinks, and the scenery as you cruise through the tropical countryside is out of this world.

It’s also crazy cheap, especially if you take the day train. Heck, even the night train is super cheap! Here are some example fares for both day and night trains:

  • Bangkok to Chiang Mai – 890 THB/$28 USD (day train), 1,011 THB/$32 USD (night train)
  • Bangkok to Chumphon – 550 THB/$17 USD (day train), 920 THB/$28 USD (night train)
  • Bangkok to Surat Thani – 858 THB/$26 USD (day train), 1,058 THB/$33 USD (night train)
  • Bangkok to Ayutthaya – 30 THB/$1 USD (day train)
  • Ayutthaya to Chiang Mai – 866 THB/$27 USD (day train), 1,131 THB/$35 USD (night train)
  • Ayutthaya to Lopburi – 30 THB/$1 USD (day train)
  • Bangkok to Korat (Nakhon Ratchasima) – 425 THB/$13.50 USD (day train), 1,010 THB/$32 USD (night train)
  • Korat (Nakhon Ratchasima) to Surin – 300 THB/$9.50 (day train)
  • Korat (Nakhon Ratchasima) to Ubon Ratchathani – 243 THB/$7.75 USD (day train), 593 THB/$19 USD (night train)

You can see train schedules and ticket prices on the State Railway of Thailand website (railway.co.th).

You can buy train tickets through a travel agent (there’s a slight upcharge) or directly at the train station. You can buy tickets the day of travel — there’s always space, especially on the day trains. That said, if you are looking for a bed on the night train, I would book at least three days in advance to ensure you have a reservation, especially during high season.

Getting Around Thailand By Bus

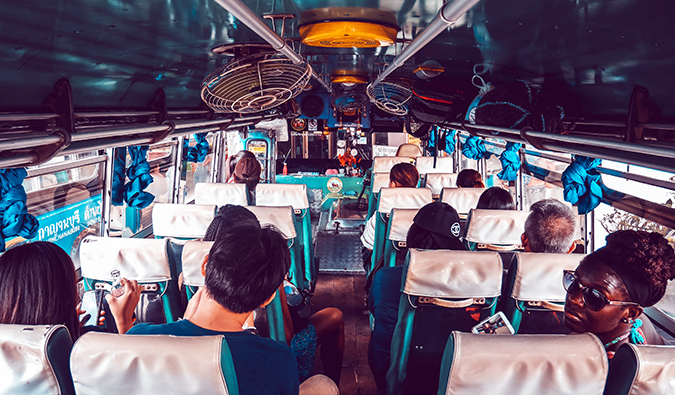
people aboard a crowded bus in Thailand with fans attached to the ceiling
As trains don’t go everywhere in Thailand, taking the bus is your second-best option. Actually, buses are the widest form of transportation here. You can go anywhere in Thailand by bus. Though they often show bad Thai movies with the sound turned up too loud and blast the A/C, they are a comfortable and spacious ride.

If you’re taking a day bus, note that they often stop in multiple towns along the way to pick people up and drop them off, and they also pick up people by the side of the road. Don’t expect to move in an efficient or quick manner. They aren’t in a rush.

Be sure to tell them exactly where you want to go, because often there are no signs when you pull into bus stations.

There are also “tourist buses” that, while more expensive, are usually a lot more convenient. They are usually best for long distances (they tend to travel at night), and when combined with island ferry tickets (say, Bangkok to Ko Phi Phi). They are more expensive than local buses, but they are more direct, and you don’t have to worry about where you are or if it’s your stop. They usually pick up in the tourist area and drop you off in the tourist area of the next place — plus there’s no stopping to pick up other people along the way.

You can book these via the many travel agents that line the tourist areas of town.

Here are some sample fares for bus routes in Thailand:

  • Bangkok to Chiang Mai – 534 THB/$17 USD (day bus), 830 THB/$26 USD (night bus)
  • Chiang Mai to Pai – 150 THB/$5 USD (day bus)
  • Chiang Mai to Chiang Rai – 229 THB/$7 USD (day bus), 312 THB/$10 USD (night bus)
  • Lampang to Chiang Rai – 237 THB/$7.50 USD (day bus)
  • Bangkok to Phuket City – 643 THB/$20 USD (day bus), 998 THB/$31 USD (night bus)
  • Bangkok to Chumphon – 373 THB/$12 USD (day bus), 427 THB/$13 USD (night bus)
  • Bangkok to Surat Thani – 858 THB/$27 USD (day bus), 1,058 THB/$33 USD (night bus)
  • Bangkok to Hua Hin – 289 THB/$9 USD (day bus), 400 THB/$12 USD (night bus)
  • Bangkok to Trat – 350 THB/$11 USD (day bus), 390 THB/$12 USD (night bus)
  • Korat (Nakhon Ratchasima) to Surin – 291 THB/$10 USD (day bus)
  • Surin to Ubon Ratchathani – 200 THB/$7 USD (day bus)

Getting Around Thailand By Car

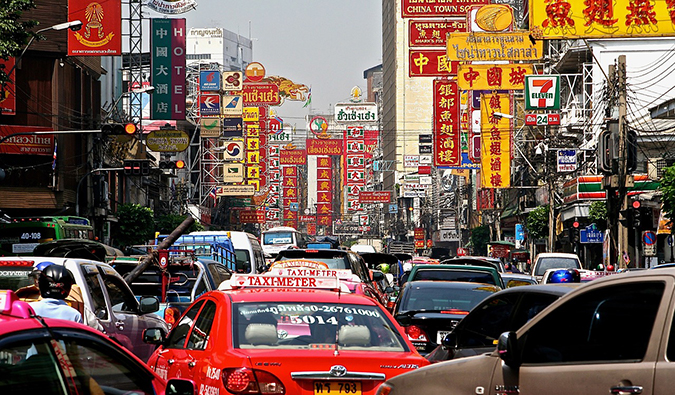
gridlocked traffic in the streets of Bangkok's Chinatown
Don’t rent a car in Thailand. They are expensive, and the roads in Thailand are crazy.

It’s much better to rent a motorbike and ride across the country. It’s quite a common thing to do. This is a good article to help you plan a trip.

Getting Around Thailand By Ferry

a small shuttle boat in Thailand
While you won’t be using the ferry to get around Thailand, it will definitely be an important mode of transportation when you’re exploring the islands. Due to the well-established travel trail, booking your ferry ride is simple and straightforward – you can often book tickets online or just show up. Most hostels and hotels will be able to help you with this if you need assistance. They will also have the most up-to-date schedules.

Here are some example routes and fares to help you plan your trip:

  • Koh Tao to Koh Samui – 500 THB/$16 (one way)
  • Surat Thani to Koh Phangan – 625 THB/$20 (one way)
  • Phuket to Koh Phi Phi – 780 THB/$25 (one way)
  • Krabi to Koh Lanta – 550 THB/$17 (one way)

How Long Does It Take to Get Around Thailand?

Trying to figure out how long it will take you to get from point A to point B? Here is a distance and time chart so you can get an idea of how long it takes to get from place to place.

Route
Distance
(km/miles)
Air (hrs)
Bus (hrs)
Rail (hrs)
Bangkok –
Chiang Mai
230/115
1:15
10
13
Bangkok –
Phuket City
840/525
1:25
12
N/A
Bangkok –
Chumpon
466/290
1
8
8:15
Lampang –
Chiang Mai
99/61
4:05*
1:45
2
Surat Thani –
Bangkok
641/398
1
11
12
Chiang Mai –
Chiang Rai
199/124
4*
3:40
N/A
Ayutthaya –
Bangkok
81/50
N/A
1:30
2
Bangkok –
Koh Samui
763/474
1:15
13-14**
13-16**
Chaing Mai –
Krabi
1,465/910
4
27
24
Bangkok –
Ubon Ratchathani
609/378
2:30
10
11

*No direct flights.
**Includes ferry

What’s the Bottom Line on Getting Around Thailand?

Trains are the best way to get around Thailand cheaply and in comfort, night buses are great for places that aren’t serviced by the train, and if you’re short on time, just fly.

***

That’s it. These are the best ways to get around Thailand. It’s pretty easy, as visitors have been traveling around here for decades and there’s an extensive network to make sure you can get from A to B no matter what!

If you have any questions, leave them in the comments!

Updated! Nomadic Matt’s Guide to Thailand

Thailand Guidebook Nomadic Matt

Want to plan the perfect trip to Thailand? Check out my comprehensive guide to Thailand written for budget travelers like yourself! It cuts out the fluff found in other guides and gets straight to the practical information you need to travel and save money. My guide will help you with:

  • Budget advice from a budget travel expert
  • Suggested itineraries with maps to help save time planning
  • The best things to see and do (while avoiding tourist traps)
  • My favorite non-touristy restaurants and bars
  • Finding the best lodgings for your wallet, with advice from a professional budget traveler
  • Transportation advice that will show you the easiest and cheapest ways to get around
  • An extensive list of important information for travelers to this region
  • And much more!

>>> Download my guide to Thailand <<<

Book Your Trip to Thailand: Logistical Tips and Tricks

Book Your Flight
Find a cheap flight by using Skyscanner or Momondo. They are my two favorite search engines, because they search websites and airlines around the globe so you always know no stone is being left unturned.

Book Your Accommodation
You can book your hostel with Hostelworld as they have the largest inventory. If you want to stay somewher eother than a hotel, use Booking.com, as they consistently return the cheapest rates for guesthouses and cheap hotels. I use them all the time.

Don’t Forget Travel Insurance
Travel insurance will protect you against illness, injury, theft, and cancellations. It’s comprehensive protection in case anything goes wrong. I never go on a trip without it, as I’ve had to use it many times in the past. I’ve been using World Nomads for ten years. My favorite companies that offer the best service and value are:

Looking for the best companies to save money with?
Check out my resource page for the best companies to use when you travel! I list all the ones I use to save money when I travel — and I think they will help you too!

Looking for more information on visiting Thailand?
Check out my in-depth destination guide to Thailand with more tips on what to see and do, costs, ways to save, and much, much more!

Photo Credit: 2

The post How to Get Around Thailand on the Cheap in 2019 appeared first on Nomadic Matt's Travel Site.

How to Get Around Japan on a Budget

a tall, colorful Buddhist pagoda overlooking Mount Fuji in Japan
Posted: 2/11/2019 | February 11th, 2019

I have a confession to make: I put off traveling to Japan until 2011 because I always thought it was too expensive.

Everyone always told me Japan was one of the most expensive countries in the world. That was the collective wisdom.

But, when I got there, I realized two things: First, I love Japan! It’s one of the most amazing, beautiful, and friendliest countries in the world. It lives up to all the hype.

Second, while Japan is expensive, it’s not out of reach for budget travelers.

There are many cheap ways to enjoy Japan on a budget.

From finding delicious food to affordable hotels to fun activities, you don’t have to pinch every penny have fun.

However, the one thing that is truly expensive in Japan? Quick transportation.

While it’s not a huge country, the island nation’s transportation infrastructure is geared to expensive, high-speed travel or inexpensive, (really) low-speed travel. There’s not much in between. It’s a three-hour train ride or a 12-hour bus ride!

So what are the best ways to travel around Japan without spending all your money on transportation?

In this post, I’ll break that down (because it does require some work).

Getting Around Japan By Train

A super fast bullet train rocketing past a snow-capped Mount Fuji in Japan
Japan’s infamous bullet trains (called shinkansen) are beautiful, comfortable, convenient, and fast. They are a wonder of transportation, racing around at speeds up to 320 km (200 miles) per hour. These trains run on special tracks, separate from the other trains.

They are a beautiful feat of engineering and a smooth ride. It’s the best in train travel.

However, they are also very, very expensive.

Individual tickets can cost hundreds of dollars — even more than airfare. To travel on a bullet train, you pay a basic train fare, then there’s an additional “super express fee” of 800 to 8,000 JPY ($7.50 to $75). For example, a one-way ticket from Kyoto to Hiroshima can cost 11,300 JPY ($105 USD), from Tokyo to Kyoto is 13,710 JPY ($126 USD), from Osaka to Tokyo is around 15,000 JPY ($140 USD), and from Tokyo to Nagasaki is 25,850 ($240 USD).

To make matters worse, there are very rarely promotions or discounts. And, unless you know Japanese, they are nearly impossible to find.

Fortunately, there are other options. Japan also has regular limited express and regional trains. Naturally, they are much slower than the shinkansen, but they are also cheaper.

For example, a trip on a local train from Kyoto to Tokyo will cost around 8,000 JPY ($73 USD) instead of 13,710 JPY ($126 USD) for the bullet train. However, the journey will take 9 hours instead of 3 hours and will also require several transfers, making it a less than an ideal choice for most travelers.

Whether you opt for the bullet train or regional trains, I think train travel is the best way to see the country. It’s just not a good idea to buy individual tickets. In order to reduce your train costs, you need to get a Japan Rail (JR) pass.

The passes are good for JR trains — both regular trains as well as the shinkansen bullet trains! — which go to nearly every destination and region in the country. What I really like is that these JR trains also serve metropolitan areas, so they can be used within cities. On my last visit, I used my pass to get around Kyoto and Tokyo instead of buying metro tickets.

The JR pass is indispensable for travel in Japan, as you get unlimited rides with it. The pass has several options (each valid for consecutive days, not just travel days):

  • 29,110 JPY ($267 USD) for 7 days
  • 46,390 JPY ($426 USD) for 14 days
  • 59,350 JPY ($545 USD) for 21 days

Even if you get just the seven-day JR pass, it will still cost less than a round-trip train ticket from Osaka to Tokyo. And you can still do a lot in seven days (it’s a small country, after all!)

The JR Pass is good on several types of JR trains. After the shinkansen, the next fastest is the tokkyu (limited express). The kyuko express train comes next, followed by the kaisoku and futs? (local trains that make every stop).

Each of these passes also has a first-class option. First-class cars in Japan are called “green cars.” The Green Car JR Pass will be around 10,000 JPY ($92 USD) more for each pass. Since the trains in Japan are already amazing, you likely don’t need to buy the Green Car pass unless you really want some luxury.

There are regional options as well if you are not traveling the entire country. These options will save you even more money since they are cheaper than the regular JR passes. You can buy JR passes for six different regions of the country:

  • JR East
  • JR West
  • JR Central
  • JR Hokkaido (the northern island)
  • JR Kyushu (the southwestern island)
  • JR Shikoku (the southeastern island)

Each region will have several pass options, usually ranging between 1-7 days. If you’re just going to be focusing on one region of the country, consider buying a JR regional pass. If you want to explore everywhere, get the regular JR Pass. (If you’re a first-time visitor to Japan, you’ll likely want the regular JR Pass, as it covers all the major destinations.)

One thing to keep in mind is that you have to buy your JR Pass before you come to Japan. So make sure you have your “exchange order” (the receipt for your pass) before you leave home! Once you get to Japan, you will exchange your “exchange order” for a JR Pass at a JR office. Make sure you have your passport when you go to collect it!

However, they are currently allowing travelers to buy their passes on arrival in some locations, but this is just a test that is set to end in March 2019. Until then, here is where you can buy your pass in Japan: Sapporo, Sendai, Niigata, Tokyo, Shinjuku, Yokohama, Nagoya, Osaka, Hiroshima, Takamatsu, Hakata, New Chitose Airport, Narita Airport, Haneda Airport, and Kansai Airport. The pass is available mainly to non-Japanese travelers who are visiting for a limited time. When you apply for the pass, you will provide your nationality and travel details. You will need your passport to collect your pass.

If you don’t buy a JR Pass and just want to buy single tickets between destinations, here are the approximate prices you’ll pay for one-way train tickets with non-reserved seats in the “ordinary” (non-green car) class:

  • Hiroshima-Tokyo: 18,040 JPY ($167 USD)
  • Tokyo-Kyoto: 13,080 JPY ($120 USD)
  • Kyoto-Hiroshima: 10,570 JPY ($98 USD)
  • Tokyo-Nagoya: 10,360 JPY ($96 USD)
  • Nagoya-Kyoto: 5,070 JPY ($47 USD)
  • Kyoto-Osaka: 560 JPY ($5.25 USD)
  • Hiroshima-Fukuoka: 28,262 JPY ($256 USD)
  • Nagano-Kanazawa: 11,924 JPY ($108 USD)
  • Tokyo-Yokohama: 4,085 PJY ($37 USD)
  • Hakodate-Tokyo: 27,934 JPY($253 USD)
  • Nara-Kyoto: 900 JPY ($8 USD)
  • Tokyo-Odawara: 7,175 JPY ($65 USD)

If you don’t have a JR Pass, you’ll pay more for a reserved seat, about 300 to 700 JPY ($2.75 to $6.50 USD). You do not typically need to get a reserved seat unless you are traveling in peak season when all seats may be taken.

Getting Around Japan By Public Bus

A pink Willer Express coach bus full of people in Japan
Buses are a less expensive alternative but they take more time. For example, the two-hour bullet train ride from Tokyo to Osaka is 10 hours on the bus.

The price for that seat is 4,500 JPY ($42 USD), but at some point, you need to think about how much your time is worth. On my last trip, saving 10,500 JPY ($97) was not worth the extra eight hours of travel, since I had limited time.

If I’d had more time, the bus would have been worth it, especially because there are so many cool stops along the way to break up the journey.

Willer Express and Japan Bus Lines have bus passes that offer unlimited travel and begin at 10,000 JPY ($93 USD) for three non-consecutive days of travel. You can see the options at willerexpress.com.

Here are some sample bus fares between popular destinations:

  • Tokyo-Kyoto: 1,599 JYP ($15 USD) – 7.5 hrs.
  • Tokyo-Nagoya: 2,998 JYP ($28 USD) – 6.5 hrs.
  • Nagoya-Kyoto: 2,550 JYP ($24 USD) – 2 hrs. 50 mins.
  • Kyoto-Hiroshima: 4,590 JYP ($42 USD) – 7 hrs. 20 mins.
  • Hiroshima-Tokyo: 6,000 JYP ($55 USD) – 12 hrs.
  • Kyoto-Osaka: 900 JYP ($8 USD) – 1.5 hrs.
  • Hiroshima-Fukuoka: 4,150 JPY ($38 USD) – 4.5 hrs.
  • Nagano-Niigata: 3,290 JPY ($30 USD) – 3 hrs.
  • Tokyo-Yokohama: 1,261 ($11 USD) – 1 hr. 20 mins.
  • Aomori-Tokyo: 8,500 JPY ($77 USD) – 9 hrs. 35 mins.
  • Nara-Kyoto: 2,800 JPY ($25 USD) – 2 hrs.
  • Kyoto-Odawara: 5,500 JPY ($50 USD) – 9 hrs.

As you can see, it’s a lot cheaper to go by bus — but it takes a lot longer!

Bottom line: If you have the time, take the bus. The coaches are comfortable, and there are overnight buses, which is a decent alternative if you’re taking a long trip. Don’t be afraid to chat people up when traveling, either: those I met in Japan were really friendly. If they’re Japanese, they’ll be more than happy to tell you all about their country (and ask about yours).

Getting Around Japan By Plane

Colorful commercial airplanes in Japan painted with Pokemon pictures
Flying has become a better option as more budget carriers now serve Japan. In general, airfares are on par with bullet train tickets. JAL and ANA are the big players. The main “budget” carriers are Peach and Jetstar Japan.

Japan is not a huge country, and I much prefer the train or bus, but if you are short on time and don’t feel like hopping from island to island on a ferry or taking the bullet train, you can fly (though it’s a lot more of a hassle!).

Here are some typical prices between a few popular destinations in Japan:

Tokyo-Kyoto:
JAL: 8,767 JPY ($81 USD) (one-way), 17,759 JPY ($164 USD) (return)
ANA: 11,239 JPY ($104 USD) (one-way), 20,323 JPY ($189 USD) (return)

Tokyo-Nagoya:
JAL: 7,081 JPY ($65 USD) (one-way), 14,611 JPY ($135 USD) (return)
ANA: 9,329 JPY ($86 USD) (one-way), 16,972 JPY ($157 USD) (return)

Osaka-Hiroshima*:
JAL: 11,352 JPY ($105 USD) (one-way), 42,036 JPY ($388 USD) (return)
ANA: 18,881 JPY ($175 USD) (one-way), 37,649 JPY ($348 USD) (return)

Hiroshima-Tokyo:
JAL: 11,576 JPY ($107 USD) (one-way), 21,018 JPY ($194 USD) (return)
ANA: 16,409 JPY ($152 USD) (one-way), 25,738 JPY ($238 USD) (return)

Tokyo-Naha (Okinawa):
JAL: 8,063 JPY ($73 USD) (one way), 23,301 JPY ($211) (return)
ANA: 11,156 JPY ($101 USD) (one way), 21,720 JPY ($196 USD) (return)

Sapporo-Osaka:
JAL: 13,254 JPY ($120 USD) (one way), 27,283 JPY ($247 USD) (return)
ANA: 7,200 JPY ($65 USD) (one way), 15,500 ($140 USD) (return)

Fukuoka-Tokyo:
JAL: 11,597 JPY ($105 USD) (one way), 23,195 JPY ($210 USD) (return)
ANA: 11,597 JPY ($105 USD) (one way), 23,195 JPY ($210 USD) (return)

Osaka-Nagano*:
JAL: 20,542 JPY ($186 USD) (one way), 41,091 JPY ($372 USD) (return)
ANA: 20,542 JPY ($186 USD) (one way), 41,091 JPY ($372 USD) (return)

*No direct flights

Moreover, ANA offers special last-minute fares for 10,800 JPY ($99 USD) or less at ana.co.jp/en/us/promotions/share/experience_jp/. These fares are available only to foreigners and can sometimes be cheaper than the flights you find on other sites, especially for longer routes.

When deciding whether to fly or travel via train, keep in mind that you’ll need to get to the airport somehow. Not all airports are close: for instance, Kyoto’s nearest airport is in Osaka. If you find flights to be really expensive (as in those to and from Hiroshima), check nearby airports and, most of all, be flexible with your itinerary.

Getting Around Japan By Ferry

Passengers lining up for a large ferry to take them to an island in Japan
Another option in Japan is an interisland ferry, and there is an extensive selection of routes. Ferries typically carry passengers, vehicles, and cargo. Passengers have a choice of three classes: second (with or without a bed), first, and special. You will not have your own private room on a ferry, though the first-class option has just two beds in each room.

Japan’s four main islands are connected by bridges and tunnels, but a lot of the smaller islands can be reached only by water. If you plan on exploring these, the Japan Ferry Pass 21 is a good option. It gives you six trips on certain longer-distance ferry routes for 21 days. The pass is 21,000 JPY ($189 USD) and is available only to foreign travelers. The pass is good for second-class travel and can’t be used during peak season; ferries must be reserved in advance. For more information, visit jlc-ferry.jp.

If you decide to go this route, keep in mind that the trips can be very long! Here are some example routes, durations, and costs:

Route
Duration (hrs)
Second Class (no bed)
First Class (with bed)

Tokyo – Kitakyushu
34
17,000 JPY ($157 USD)
20,000 JPY ($183 USD)

Osaka – Shibushi
15
14,660 JPY ($134 USD)
22,000 JPY ($203 USD)

Kobe – Takamatsu
4
2,290 JPY ($21 USD)
4,300 JPY ($39 USD)

Niigata – Otaru
17
6,680 JPY($61 USD;
shared room with bed)
14,160 JPY ($130 USD)

Naha – Tokashiki
1
1,660 JPY ($15 USD)
N/A

Naha – Kumejima
4
3,390 JPY ($31 USD)
N/A

Kagoshima – Naha
26
15,000 JPY ($136 USD)
29,000 JPY ($262 USD)

Beppu – Osaka
12
12,000 JPY ($109 USD)
20,000 JPY ($181 USD)

Getting Around Japan By Car

The blurred lights of a busy superhighway in Japan at night
I don’t recommend renting a car and driving around Japan on your own. For one, rental cars are much more expensive than public transit options. In most places, traffic is frustrating, parking is a big hassle, and unless you speak Japanese, getting around is going to be very difficult.

Getting Around Japan By Hitchhiking

If you are feeling adventurous, you can hitchhike. Japan’s a really safe country, and it’s a chance for a free ride! While almost no Japanese hitchhike, many are more than happy to pick up foreigners. It’s an opportunity for them to practice their English and engage a new culture, so don’t be afraid to stick out a thumb!

Even out in the countryside, you won’t have a hard time finding a ride. Even people who don’t speak English will pick you up, as the people really are incredibly kind and giving. Don’t be surprised if you get asked to meet their family or friends or share a meal with them!

Our Community Manager, Chris, spent a month backpacking and hitchhiking in Japan. He never waited too long for a ride, and people were incredibly friendly. They bought him snacks and meals, drove way out of their way to help him, and even took them to their homes to meet their family. If you’re comfortable doing this, it can be a very culturally rewarding experience!

If you decide to go this route, make a sign letting people know which direction you’re headed. Add a smiley face and other cute drawings to up your chances of finding a ride. A good resource for finding the best places to find a ride is Hitchwiki.

How Long Does it Take to Get Around Japan?

Here are some distances and travel times. I think this will convince you that the train really is the way to go.

Route
Road (km/miles)
Air (hrs.)
Train (hrs.)
Bus (hrs.)

Tokyo-Kyoto**
453/281
1
2:40
7:30

Tokyo-Nagoya
347/216
1:10
2:10
6:30

Nagoya-Kyoto**
135/84
4*
0:50
2:50

Kyoto**-Hiroshima
361/224
3:50*
1:40
7:20

Hiroshima-Tokyo
8017/501
1:50
5
12

Kyoto-Osaka
58/36
N/A
0:25
1:30

Tokyo-Sapporo
1,154/717
1:90
7:30
N/A

Osaka-Fukuoka
611/379
1:20
2:20
11

Fukuoka-Sapporo
2,056/1,277
2:16
20:18
37

***

The Best Way to Get Around Japan

Bottom line: The best transportation option really depends on the length of your trip. If you only have a week or so in Japan and want to get around really quick, get a rail pass and take the train everywhere you need to go. It’s not going to be cheap, but it will be the most efficient. If you have more time and have a lot of places to visit in a similar geographic region, take the bus. If you’re not comfortable hitchhiking, try an app like CarpoolWorld, which helps you find all sorts of carpool, vanpool, and rideshare listings by destination.

Whichever method you choose, you’ll be in good hands. Japan has some of the safest, cleanest, most efficient travel options in the world, so enjoy!

Book Your Trip to Japan: Logistical Tips and Tricks

Book Your Flight
Find a cheap flight by using Skyscanner or Momondo. They are my two favorite search engines because they search websites and airlines around the globe so you always know no stone is left unturned.

Book Your Accommodation
You can book your hostel with Hostelworld as they have the most comprehensive inventory so they are best for booking a hostel. If you want to stay in a hotel or guesthouse in Japan, use Booking.com as they consistently return the cheapest rates for guesthouses and cheap hotels. They’re the best booking site out there. My favorite places to stay in Japan are:

  • Khaosan Tokyo Kabuki (Tokyo) – This is one of the best hostels in the country. The staff go above and beyond, each room has its own bathroom, and it’s in a great location to help you explore the city.
  • Jiyujin (Kyoto) – This is a smaller hostel that’s great for anyone looking to have a more quiet and relaxed stay in the city.
  • K’s House (Hiroshima) – This is a great chain of hostels around the country. The staff are helpful, the common areas are always full of people, and they also have free tea and coffee.

Don’t Forget Travel Insurance
Travel insurance will protect you against illness, injury, theft, and cancellations. It’s comprehensive protection in case anything goes wrong. I never go on a trip without it as I’ve had to use it many times in the past. I’ve been using World Nomads for ten years. My favorite companies that offer the best service and value are:

Looking for the best companies to save money with?
Check out my resource page for the best companies to use when you travel! I list all the ones I use to save money when I travel – and I think will help you too!

Looking for more travel tips for Japan
Check out my in-depth Japan travel guide for more ways to save money, costs, tips on what to see and do, suggested itineraries, reading, packing lists, and much, much more!

Photo Credit: 1, 2, 4, 5, 6

The post How to Get Around Japan on a Budget appeared first on Nomadic Matt's Travel Site.